There's something undeniably joyful about a beautifully decorated sugar cookie. Whether it's the sparkle of holiday sprinkles or the gentle pastel hues of springtime treats, a good icing turns simple cookies into edible art. This sugar cookie icing recipe for decorating is my go-to when I want smooth, glossy finishes that set just right not too hard, not too soft, just perfect. It only takes a handful of pantry staples and a few minutes to make.
Jump to:

Why You'll Love This Recipe
Key Benefits
- Beginner-friendly: No need for royal icing techniques or fancy tools.
- Fast and fuss-free: Comes together in under 5 minutes.
- Versatile: Works for piping, spreading, or dipping.
- Kid-approved: Sweet, easy to color, and fun to use.
Taste & Texture
This icing has a smooth, glossy finish with a gentle sweetness that complements, not overpowers, your cookies. It sets beautifully to the touch, making it ideal for stacking and gifting. The corn syrup (or honey) helps it dry with a subtle sheen and just the right amount of firmness.
Dietary Attributes
- Vegetarian
- Gluten-free (check your powdered sugar brand)
- Can be made nut-free depending on extract
Ingredients & Substitutions
Ingredient List
- 2 cups powdered sugar (sifted for smoothness)
- 2-4 tablespoons milk (start with 2 tablespoon and adjust)
- 1 tablespoon light corn syrup or honey
- 1 teaspoon extract (vanilla, almond, peppermint, or coconut)
- Food coloring (gel colors recommended for vibrant hues)
Notes on Quality
- Powdered Sugar: Go for a fine-quality brand to avoid clumping.
- Milk: Whole milk gives richness, but any milk works.
- Corn Syrup vs. Honey: Corn syrup creates a shinier, longer-lasting finish, while honey offers a warmer sweetness and a more natural option.
Possible Substitutions
- Milk: Use dairy-free alternatives like almond or oat milk.
- Sweetener Base: Swap corn syrup with agave or maple syrup for a different flavor profile.
- Extracts: Almond extract adds a bakery-style note, while peppermint gives a wintery feel. Coconut is subtle and perfect for tropical-themed cookies.
Step-by-Step Instructions
- Mix the base: In a medium bowl, combine 2 cups powdered sugar, 2 tablespoons milk, 1 tablespoon corn syrup or honey, and your chosen extract.
- Adjust consistency: Slowly add more milk (up to 2 additional tablespoons), stirring constantly, until you reach your desired texture:
- Thicker icing for piping or spreading
- Thinner icing for dipping or flooding
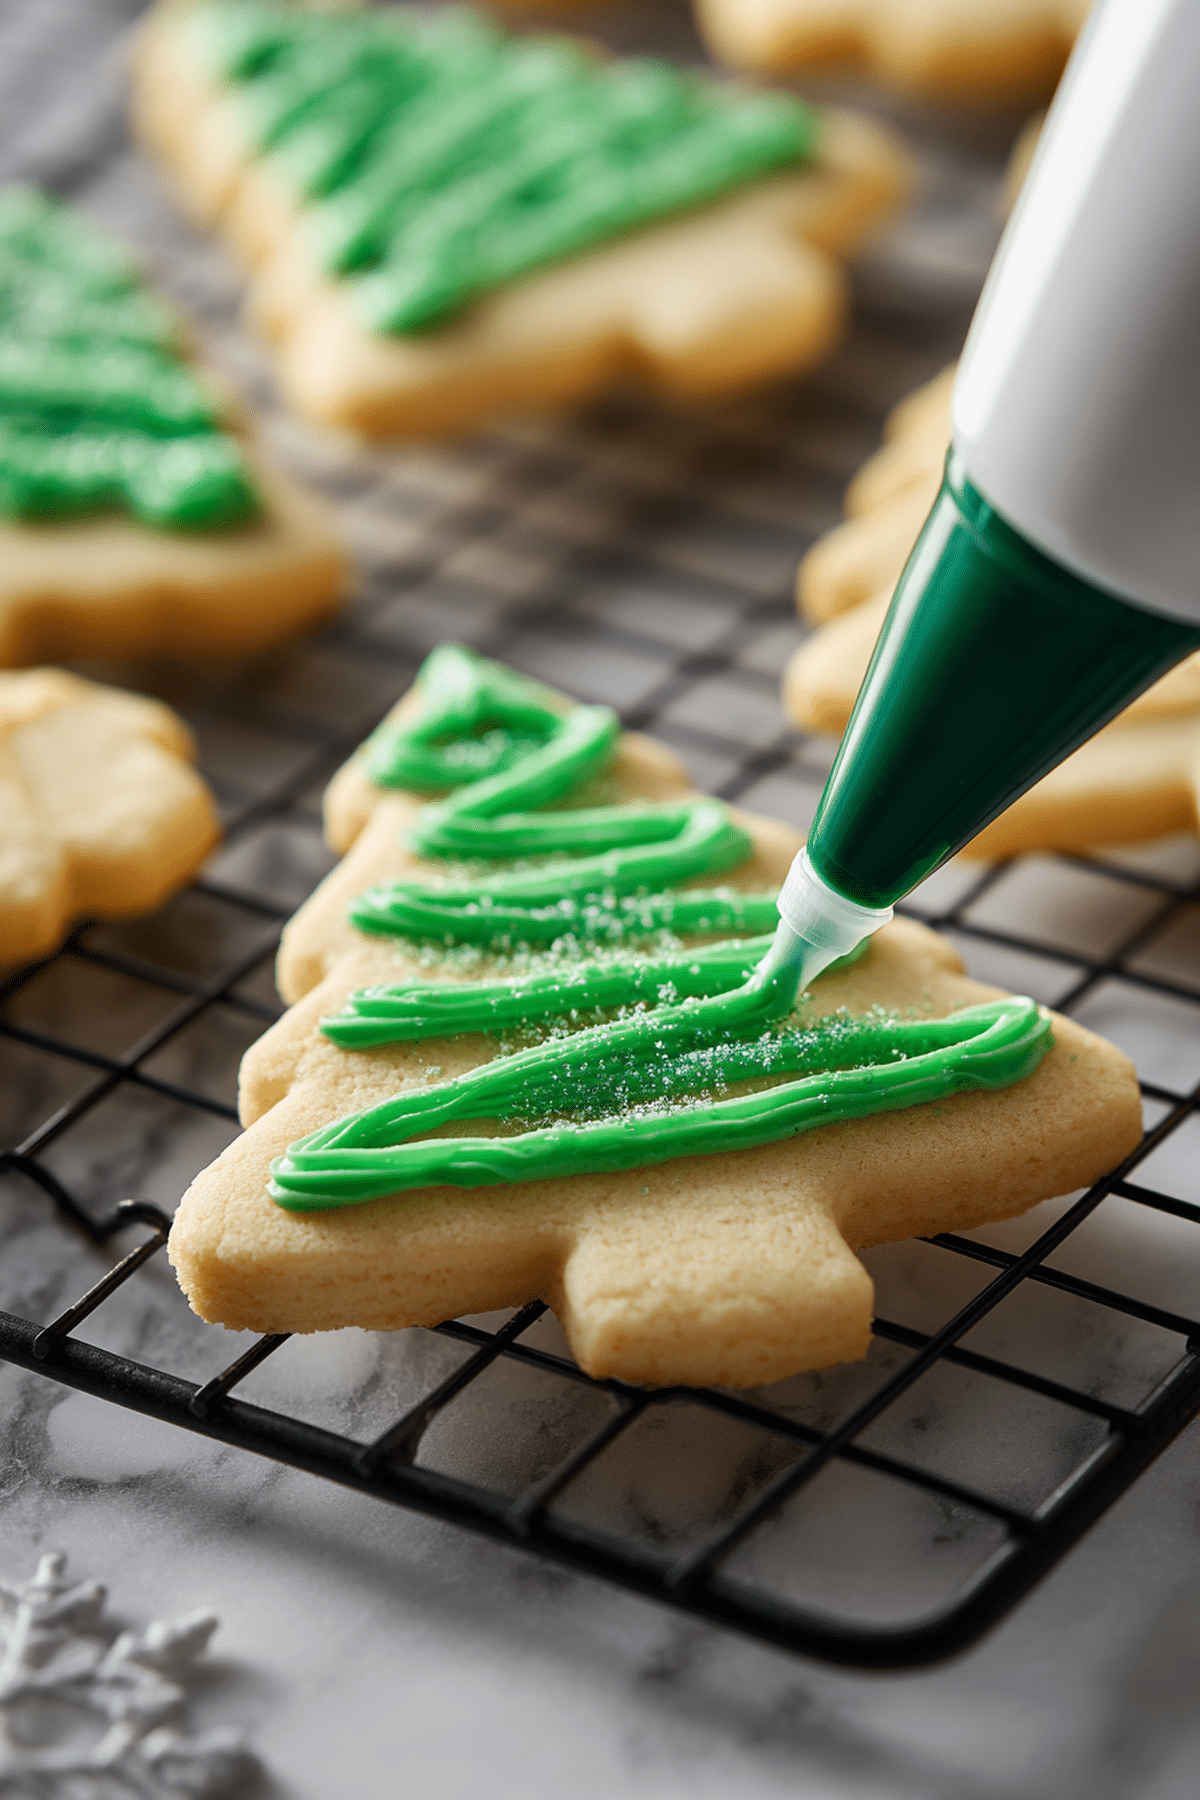
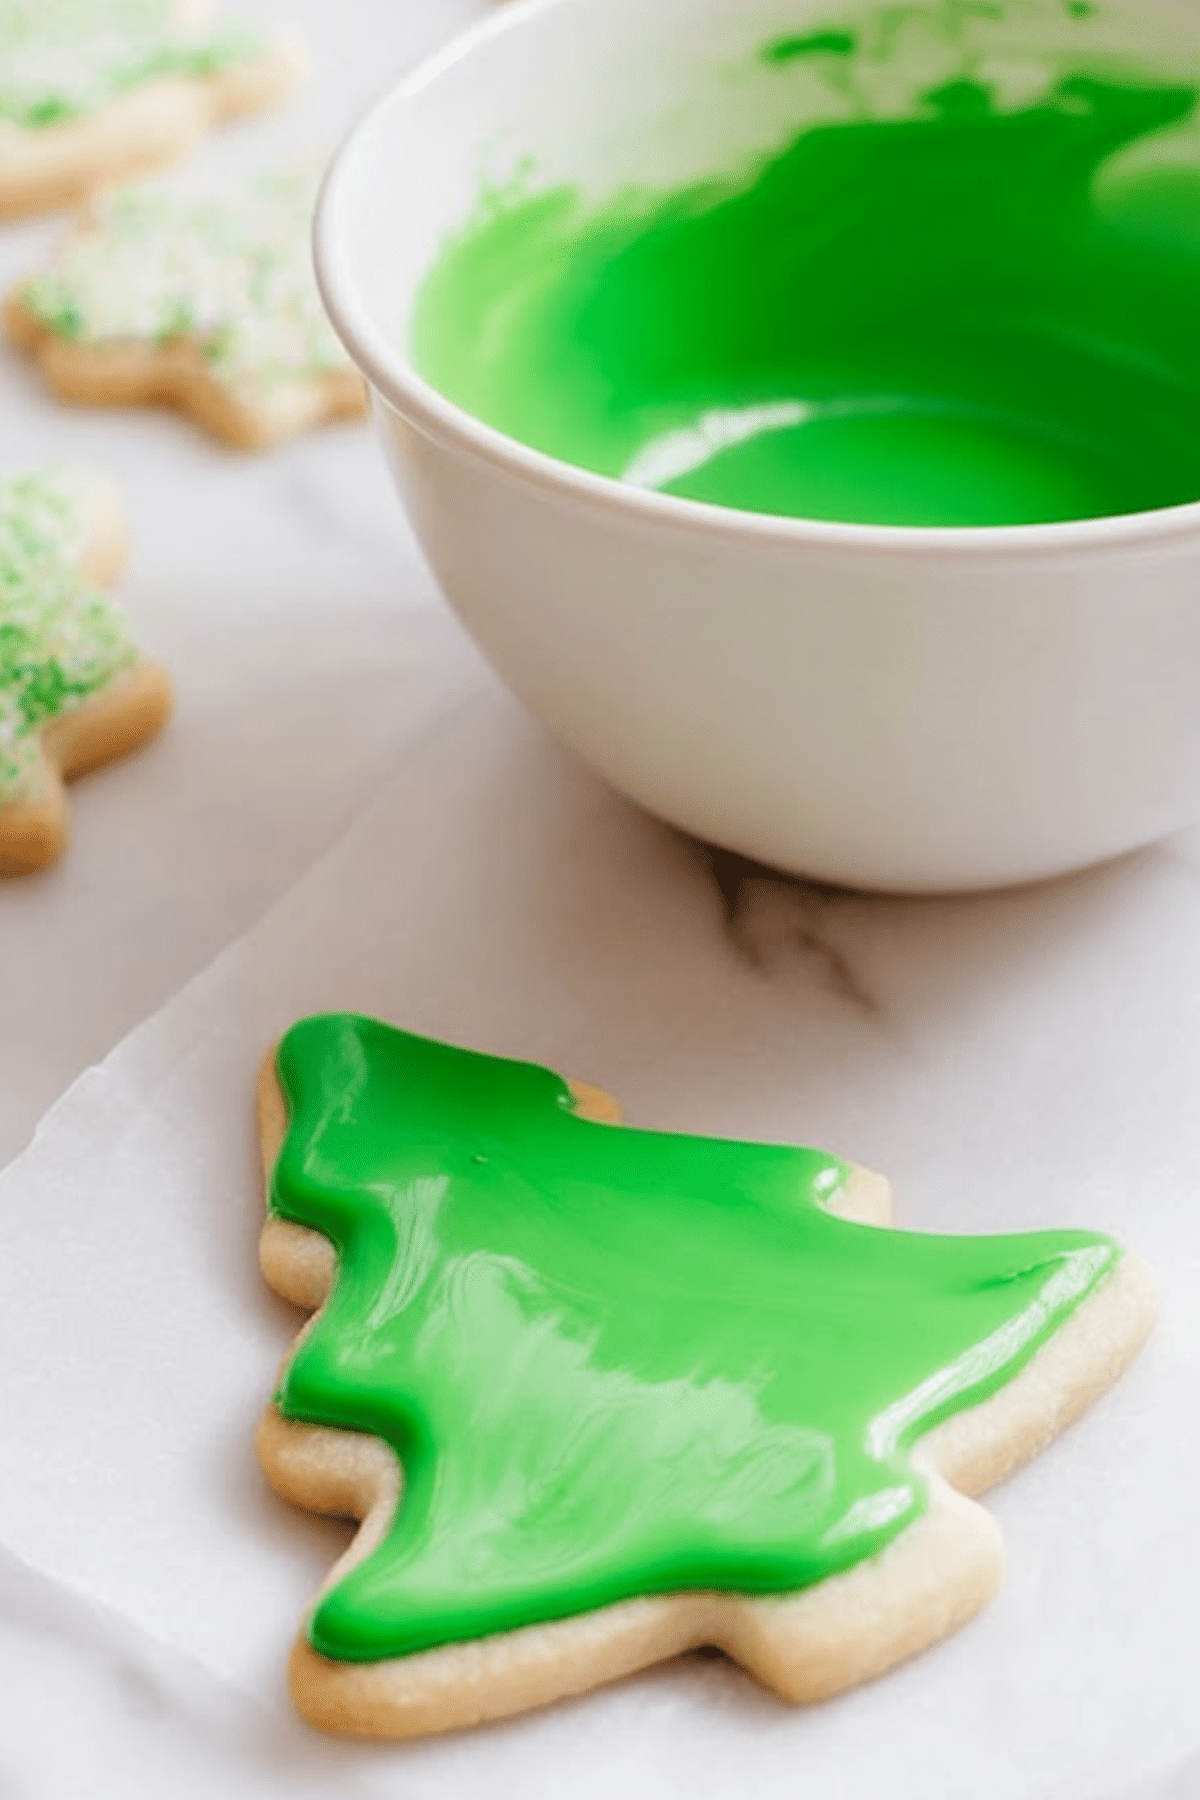
- Color it: Divide the icing into bowls and mix in food coloring as desired.
- Decorate: Use a piping bag, spoon, or dip cookies directly into the icing.
- Add toppings: If using sprinkles or sugar decorations, apply them while the icing is still wet.
- Let it set: Allow cookies to dry at room temperature for several hours or overnight for stackable results.
Expert Tips & Tricks
Best Practices
- Use gel food coloring for the most vibrant shades without watering down the icing.
- Test consistency by letting a spoonful fall back into the bowl it should disappear into itself within 10 seconds for flooding.
- Let icing rest for 5-10 minutes before using to help air bubbles rise and pop.
Common Mistakes
- Too runny? Add more powdered sugar a tablespoon at a time.
- Too thick? Add milk drop by drop to thin it out.
- Crusting too fast? Cover bowls of icing with plastic wrap pressed directly onto the surface to prevent drying out while you work.
Time-Saving Tips
- Make the icing a day ahead and store in airtight containers.
- Prep a batch of pre-colored icing in squeeze bottles for easy decorating.
- Set up a decorating station with wax paper or cooling racks for efficient drying.
Serving Suggestions
Pairings
- Classic sugar cookies, shortbread, gingerbread cutouts, or even graham crackers.
- Sandwich between two cookies for colorful cookie sandwiches.
Presentation Ideas
- Use fine-tipped piping bags for detailed work and writing.
- Mix a small amount of white food coloring with your base for a more opaque finish.
- Create ombre effects or marbling by swirling two colors together slightly.
Beverage Pairings
- Warm milk or hot cocoa for kids.
- Spiced chai or peppermint tea for grown-up gatherings.
- Cold almond milk with a dash of cinnamon for a light, dairy-free option.
Storage & Reheating
Leftover Storage
- Store leftover icing in an airtight container in the fridge for up to 1 week.
- Bring to room temperature and stir before using again.
Reheating Methods
- If icing thickens too much in storage, add a few drops of milk and stir until smooth.
- You can warm briefly (5-10 seconds in the microwave) to help it loosen, but stir well afterward.
Frequently Asked Questions
Substitutions & Adjustments
- Can I use lemon juice instead of extract? Yes, but use sparingly (½ tsp) and reduce the milk slightly to adjust.
- Can I make it vegan? Yes! Use plant milk and maple syrup or agave instead of honey or corn syrup.
- Can I halve or double the recipe? Absolutely. It scales easily and consistently.
Troubleshooting
- Icing is dull: Add a bit more corn syrup or honey to restore shine.
- Color bleeding on cookies: Let the base coat fully dry before adding details or layering colors.
- Cookies take too long to dry: Dry in front of a fan for faster results.

Variations & Customizations
Dietary Adaptations
- Use gluten-free vanilla extract and ensure powdered sugar is GF certified.
- Opt for dairy-free milk and vegan sweeteners to make it completely plant-based.
Flavor Twists
- Add citrus zest (lemon or orange) to the icing for a zingy touch.
- Mix in cocoa powder (1-2 teaspoons) for a chocolate sugar cookie icing.
Seasonal/Holiday Versions
- Winter: Peppermint extract and crushed candy cane topping
- Spring: Soft pastel shades with floral sprinkles
- Autumn: Maple syrup base with cinnamon or pumpkin spice extract
- Summer: Coconut or lime extract for tropical flair
Why This Recipe Belongs in Your Kitchen
This sugar cookie icing is more than just decoration it's the finishing touch that brings joy, creativity, and a personal stamp to every cookie you share. It's easy enough for beginners, customizable enough for pros, and dependable enough for every holiday, celebration, or quiet afternoon of baking. Whether you're planning a cookie swap or decorating with kids on a rainy day, this icing is your trusted kitchen companion.
Print
Sugar Cookie Icing Recipe for Decorating
- Prep Time: 5 minutes
- Cook Time: 0 minutes
- Total Time: 5 minutes
- Yield: Decorates about 24 cookies 1x
- Category: Dessert
- Method: No-Cook
- Cuisine: American
- Diet: Vegetarian
Description
This smooth, glossy sugar cookie icing is perfect for decorating with kids or crafting elegant treats. It sets just right not too hard, not too soft and takes only minutes to make.
Ingredients
- 2 cups powdered sugar (sifted for smoothness)
- 2-4 tablespoons milk (start with 2 tbsp and adjust)
- 1 tablespoon light corn syrup or honey
- 1 teaspoon extract (vanilla, almond, peppermint, or coconut)
- Food coloring (gel recommended)
Instructions
- In a medium bowl, combine powdered sugar, 2 tablespoons milk, corn syrup or honey, and extract.
- Slowly stir in additional milk (up to 2 tbsp) to reach desired consistency.
- Divide into bowls and mix in food coloring as needed.
- Decorate cookies using a piping bag, spoon, or by dipping.
- While icing is wet, add sprinkles or decorations if desired.
- Let cookies dry for several hours or overnight before stacking.


Notes
Store in an airtight container in the fridge for up to 1 week. Stir and adjust with milk before using again. Let icing sit 5-10 minutes before using to release bubbles. For flooding, icing should disappear into itself in about 10 seconds.
Nutrition
- Serving Size: 1 decorated cookie
- Calories: 60
- Sugar: 12g
- Sodium: 1mg
- Fat: 0g
- Saturated Fat: 0g
- Unsaturated Fat: 0g
- Trans Fat: 0g
- Carbohydrates: 15g
- Fiber: 0g
- Protein: 0g
- Cholesterol: 0mg