These golden little rounds crispy on the outside, soft and steamy on the inside are my idea of comfort in a bite. This rice paddu recipe brings together the goodness of fermented batter, the warmth of a spiced tempering, and the joy of cooking something simple yet soulful. Whether you call them paddu, appe, or paniyaram, one thing's certain: they're the kind of food that makes a kitchen feel like home.
Jump to:
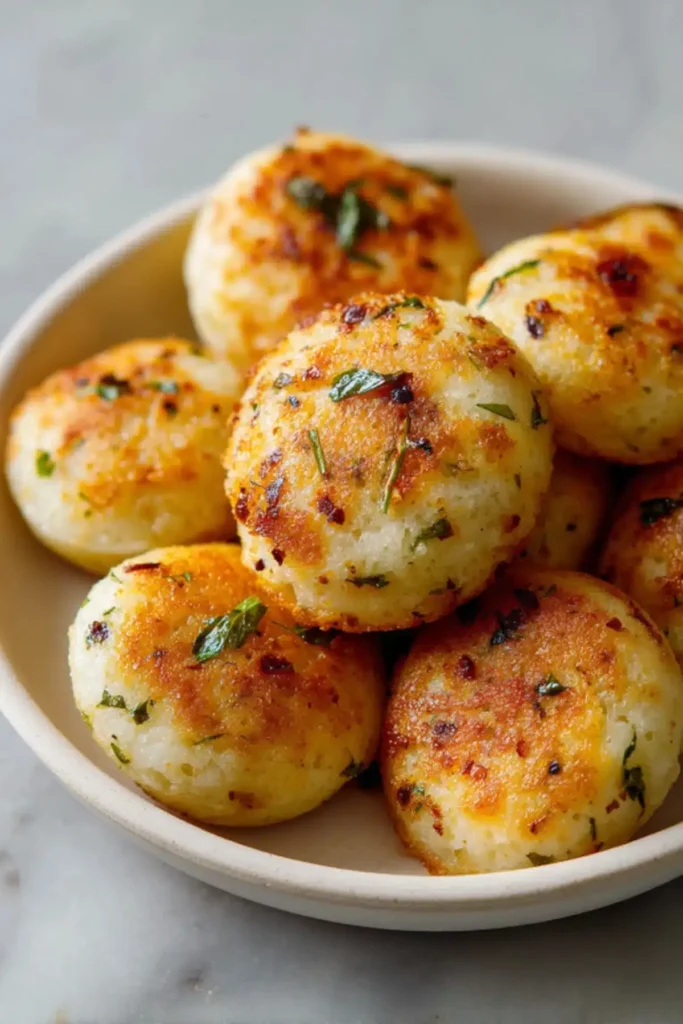
Made from a blend of rice, lentils, and poha, these rice paddus are naturally gluten-free, lightly spiced, and perfect for breakfast, a snack, or even dinner with chutney on the side. The best part? That golden crust from the appe pan a gentle kiss of heat that seals in all the flavor.
Why You'll Love This Recipe
Key Benefits
- Easy to make ahead - The batter ferments overnight, so breakfast is a breeze.
- Pan-fried, not deep-fried - Light on oil but big on crispiness.
- Family-friendly - Kids and adults alike love the poppable shape and mild flavor.
- Budget-conscious - Made with pantry staples and no fancy equipment required beyond an appe pan.
Taste & Texture
These rice paddus have the dreamiest contrast: a crisp, golden shell that gives way to a soft, airy center. The tempered onions, curry leaves, and green chilies lend bursts of savory flavor, while the fermented batter brings that irresistible hint of tang.
Dietary Attributes
- Vegetarian
- Gluten-free
- Can be made vegan by skipping the tempering or using oil instead of ghee.
Ingredients & Substitutions
Ingredient List
For the Batter:
- 1 cup idli rice (or use raw/parboiled rice)
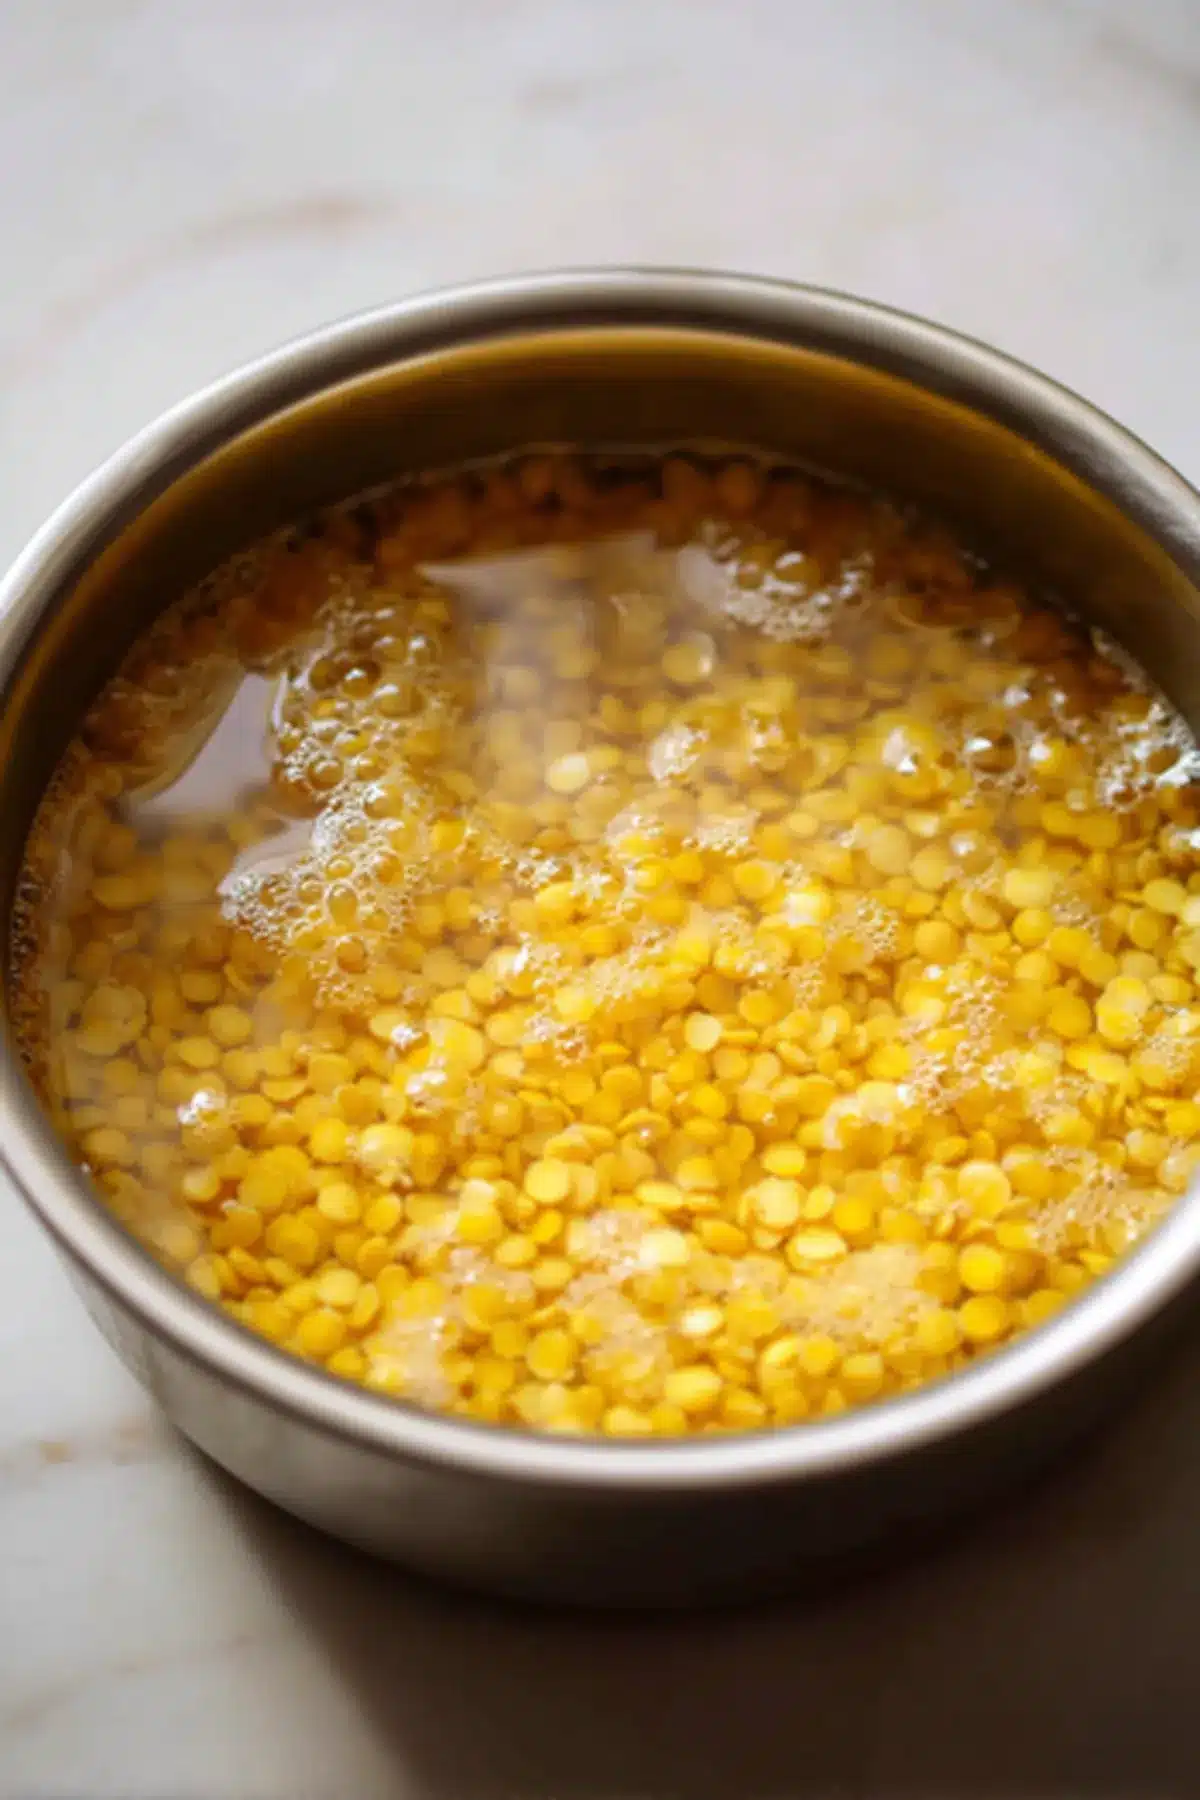
- 3 tablespoon urad dal (hulled black gram)
- 2 tablespoon moong dal (green gram)
- 2 tablespoon chana dal (Bengal gram)
- 2 cups water (for soaking rice)
- ½ cup water (for soaking lentils)
- ¼ cup thick poha (flattened rice), rinsed
- ¼ cup water (for grinding lentils)
- ½ cup water (for grinding rice)
- ½ teaspoon rock salt (or to taste)
For Tempering (Optional but Recommended):
- 1 tablespoon oil
- ½ teaspoon mustard seeds
- ½ teaspoon cumin seeds
- ½ cup finely chopped onions
- 1 tablespoon curry leaves, chopped
- 1 teaspoon green chilies, finely chopped
- 1 pinch asafoetida (hing)
- 2-3 tablespoon coriander leaves, chopped
For Frying:
- 2-3 tablespoon oil (or as needed)
Notes on Quality
- Use fresh rice and dals for best fermentation.
- Poha enhances softness opt for thick variety if possible.
- Rock salt adds subtle flavor; table salt can be used in a pinch.
Possible Substitutions
- Skip poha for a denser texture.
- Replace moong and chana dal with more urad dal for a simpler version.
- Add soaked fenugreek seeds (5-6) for extra flavor and fermentation boost.
Step-by-Step Instructions
1. Soak & Prepare Batter
- Rinse all the dals 3-4 times. Soak with ½ cup water for 4 hours.
- Rinse rice 3-4 times and soak separately with 2 cups water for 4 hours.
- Rinse poha well and set aside.
- Drain all soaked ingredients before grinding.
2. Grind
- First, grind lentils with ¼ cup water to a thick, smooth batter.
- Pour into a large bowl.
- Then grind rice and poha with ½ cup water to a smooth or lightly grainy batter.
- Combine both batters in the bowl. Add salt and mix well.
3. Ferment
- Cover and ferment overnight (8-9 hours or more based on climate) until bubbly and light.
4. Prepare Tempering (Optional but Flavorful)
- Heat 1 tablespoon oil in a pan.
- Add mustard seeds; let them splutter.
- Add cumin seeds, onions, green chilies, curry leaves, and a pinch of asafoetida.
- Sauté until onions soften (2-3 minutes).
- Stir this mix into the batter. Add coriander leaves and mix again.
5. Cook Paddu
- Heat appe pan on medium heat. Add ¼ teaspoon oil to each mould.
- Once oil is hot, fill each mould ¾ full with batter.
- Cover and cook until the tops are set and bottoms golden.
- Flip and cook uncovered until crisp and golden on both sides.
Expert Tips & Tricks
Best Practices
- Use a cast-iron appe pan for the crispiest results.
- Keep the heat medium too high and the outsides will brown before the insides cook.
- Mix the batter gently after fermentation to retain airiness.
Common Mistakes
- Batter too runny: Add a bit of rice flour to adjust.
- Not fermenting enough: The paddu will be dense and flat.
- Overfilling the pan: Batter may overflow stick to ¾ full.
Time-Saving Tips
- Grind batter in advance and refrigerate for up to 2 days.
- Tempering can be made the night before and added in the morning.

Serving Suggestions
Pairings
- Coconut chutney
- Coriander-mint chutney
- Tomato-onion chutney
- Ginger or peanut chutney for a spicy kick
Presentation Ideas
- Serve on a banana leaf for a traditional touch.
- Sprinkle with fresh herbs or grated coconut.
- Skewer them for a fun appetizer-style presentation.
Beverage Pairings
- Masala chai
- Filter coffee
- Fresh buttermilk or a tangy aam panna
Storage & Reheating
Leftover Storage
- Refrigerate cooled paddu in an airtight container for 2 days.
- Batter can be stored up to 48 hours in the fridge.
Reheating Methods
- Reheat on a pan with a tiny splash of oil until warmed and crisp.
- Avoid microwaving they'll turn chewy.

Frequently Asked Questions
Substitutions & Adjustments
Can I use only urad dal?
Yes use about 7 tablespoons of urad dal for a simpler version.
What kind of rice works best?
Short or medium-grain white rice, or parboiled rice, all work well.
Is poha necessary?
Not strictly, but it improves softness. You can skip it if needed.
Troubleshooting
Why is my paddu not crispy?
Either the batter is too watery or the pan wasn't hot enough.
Why didn't my batter rise?
Try placing it in a slightly warm oven (switched off) to ferment.
Variations & Customizations
Dietary Adaptations
- For vegan: Skip tempering or use oil instead of ghee.
- Gluten-free as is just ensure your asafoetida is GF-certified.
Flavor Twists
- Add grated coconut or carrot to the batter.
- Spice it up with black pepper or ginger.
- Mix in crushed curry leaves for extra aroma.
Seasonal/Holiday Versions
- Add fresh corn or methi leaves during monsoon.
- Serve with festive chutneys like tomato-garlic or coconut-mint during holidays.


Why This Recipe Deserves a Spot in Your Kitchen
There's a quiet kind of magic in making rice paddu a rhythm of soaking, grinding, fermenting, and finally hearing that first sizzle in the pan. Each bite holds the warmth of tradition, the joy of sharing, and the reward of patience. Whether you're new to South Indian cooking or grew up with paddu as a breakfast staple, this recipe brings comfort, connection, and crisp golden bites to your table.
If you try it, I'd love to know leave a note or share your own spin on it!

Rice Paddu Recipe (Crispy South Indian Appe)
- Prep Time: 8 hours (includes soaking & fermentation)
- Cook Time: 20 minutes
- Total Time: 8 hours 20 minutes
- Yield: 4 servings 1x
- Category: Breakfast, Snack
- Method: Stovetop
- Cuisine: South Indian
- Diet: Vegetarian
Description
These golden little rounds crispy on the outside, soft and steamy on the inside are my idea of comfort in a bite. This rice paddu recipe brings together the goodness of fermented batter, the warmth of a spiced tempering, and the joy of cooking something simple yet soulful.
Ingredients
- 1 cup idli rice (or raw/parboiled rice)
- 3 tbsp urad dal (hulled black gram)
- 2 tbsp moong dal (green gram)
- 2 tbsp chana dal (Bengal gram)
- 2 cups water (for soaking rice)
- ½ cup water (for soaking lentils)
- ¼ cup thick poha (flattened rice), rinsed
- ¼ cup water (for grinding lentils)
- ½ cup water (for grinding rice)
- ½ tsp rock salt (or to taste)
- 1 tbsp oil (for tempering)
- ½ tsp mustard seeds
- ½ tsp cumin seeds
- ½ cup finely chopped onions
- 1 tbsp curry leaves, chopped
- 1 tsp green chilies, finely chopped
- 1 pinch asafoetida (hing)
- 2-3 tablespoon coriander leaves, chopped
- 2-3 tablespoon oil (or as needed for frying)
Instructions
- Rinse all the dals 3-4 times and soak with ½ cup water for 4 hours.
- Rinse rice 3-4 times and soak separately with 2 cups water for 4 hours.
- Rinse poha well and set aside. Drain all soaked ingredients before grinding.
- Grind lentils with ¼ cup water to a thick, smooth batter and pour into a bowl.
- Grind rice and poha with ½ cup water to a smooth or lightly grainy batter. Combine with lentils.
- Add salt and mix well. Cover and ferment overnight (8-9 hours or more based on climate) until bubbly and light.
- To temper, heat 1 tablespoon oil in a pan. Add mustard seeds and let splutter. Then add cumin, onions, chilies, curry leaves, and asafoetida.
- Sauté until onions soften. Stir this into the batter with coriander leaves and mix again.
- Heat appe pan on medium. Add ¼ teaspoon oil to each mould. Fill each ¾ full with batter.
- Cover and cook until tops are set and bottoms golden. Flip and cook uncovered until crisp and golden on both sides.


Notes
Use a cast-iron appe pan for extra crispiness. Medium heat ensures the inside cooks through. Mix gently after fermentation to retain air. Batter too runny? Add rice flour. Not fermenting enough makes them dense. Grind batter ahead and refrigerate up to 2 days. Pair with coconut or mint chutney. Avoid microwaving use a pan to reheat with a splash of oil for best texture.
Nutrition
- Serving Size: 4-5 pieces
- Calories: 160
- Sugar: 1g
- Sodium: 210mg
- Fat: 5g
- Saturated Fat: 0.5g
- Unsaturated Fat: 4.5g
- Trans Fat: 0g
- Carbohydrates: 22g
- Fiber: 2g
- Protein: 4g
- Cholesterol: 0mg