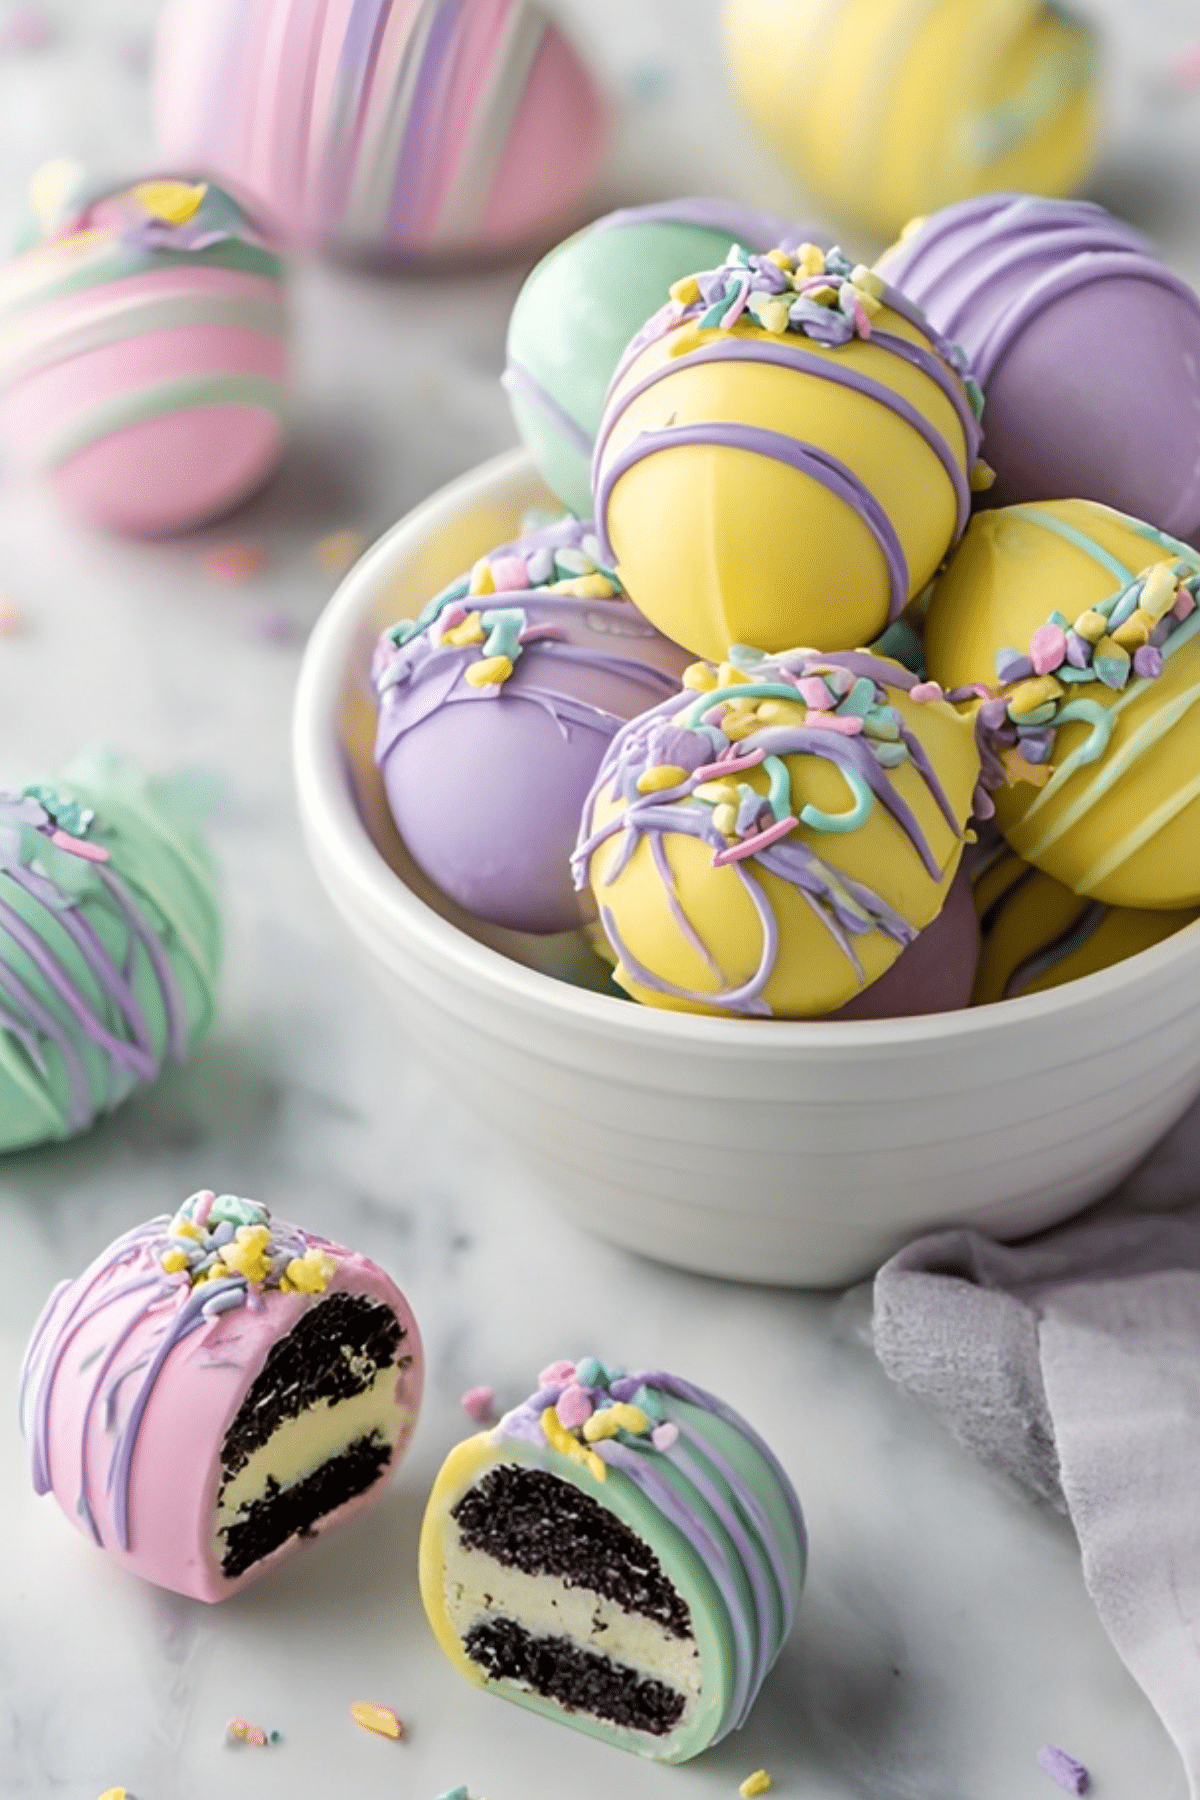
Easter Egg Oreo Balls are one of those delightful treats that instantly bring a little magic to the holiday table. Creamy, chocolatey, and irresistibly sweet, these no-bake bites are shaped like colorful Easter eggs and decorated with sprinkles, drizzle, or playful candy eyes. They're simple to make, fun to decorate, and perfect for sharing with family and friends.
Jump to:

Every time I make these, it feels like crafting tiny edible treasures. The crushed Oreo cookies blend beautifully with rich cream cheese, creating a smooth, fudgy filling that melts in your mouth. Once coated in silky melted chocolate and dressed in festive decorations, they become the kind of dessert that disappears from the plate faster than you'd expect.
Whether you're making them for an Easter party, gifting them in little treat boxes, or simply enjoying a sweet kitchen moment with kids, Easter Egg Oreo Balls turn a simple dessert into a joyful holiday tradition.
Why You'll Love This Recipe
Key Benefits
These Easter treats are wonderfully simple and beginner-friendly.
- No baking required
- Only a few ingredients
- Perfect for kids and family activities
- Make-ahead friendly
- Customizable decorations
The process is easy enough for beginners but still creative enough to feel special.
Taste & Texture
Each bite is rich and indulgent.
- Soft, creamy Oreo filling
- Smooth chocolate coating
- Slight crunch from sprinkles or decorations
The contrast between the silky center and the chocolate shell makes them irresistibly satisfying.
Dietary Attributes
While these are a sweet treat, they can easily be adapted.
- Can be made gluten-free using gluten-free sandwich cookies
- Naturally no-bake
- Easy to portion into small dessert bites
Ingredients & Substitutions
Ingredient List
- 1 pack (15.35 oz) Oreo cookies, finely crushed
- 1 pack (8 oz) cream cheese, softened
- 2 cups chocolate melting wafers or white chocolate, melted
- Sprinkles or edible glitter for decoration
- Candy eyes (optional)
- Colored chocolate for drizzling (optional)
Notes on Quality
Using regular Oreo cookies gives the filling the perfect chocolate flavor and creamy consistency. Make sure the cream cheese is softened before mixing so the filling becomes smooth and evenly blended.
Chocolate melting wafers are ideal because they melt smoothly and set nicely around the cookie balls.

Possible Substitutions
If you want to customize the recipe:
- Use golden sandwich cookies for a vanilla twist
- Substitute dark chocolate or milk chocolate for coating
- Use dairy-free cream cheese if needed
- Swap sprinkles with shredded coconut or crushed candies
Step-by-Step Instructions
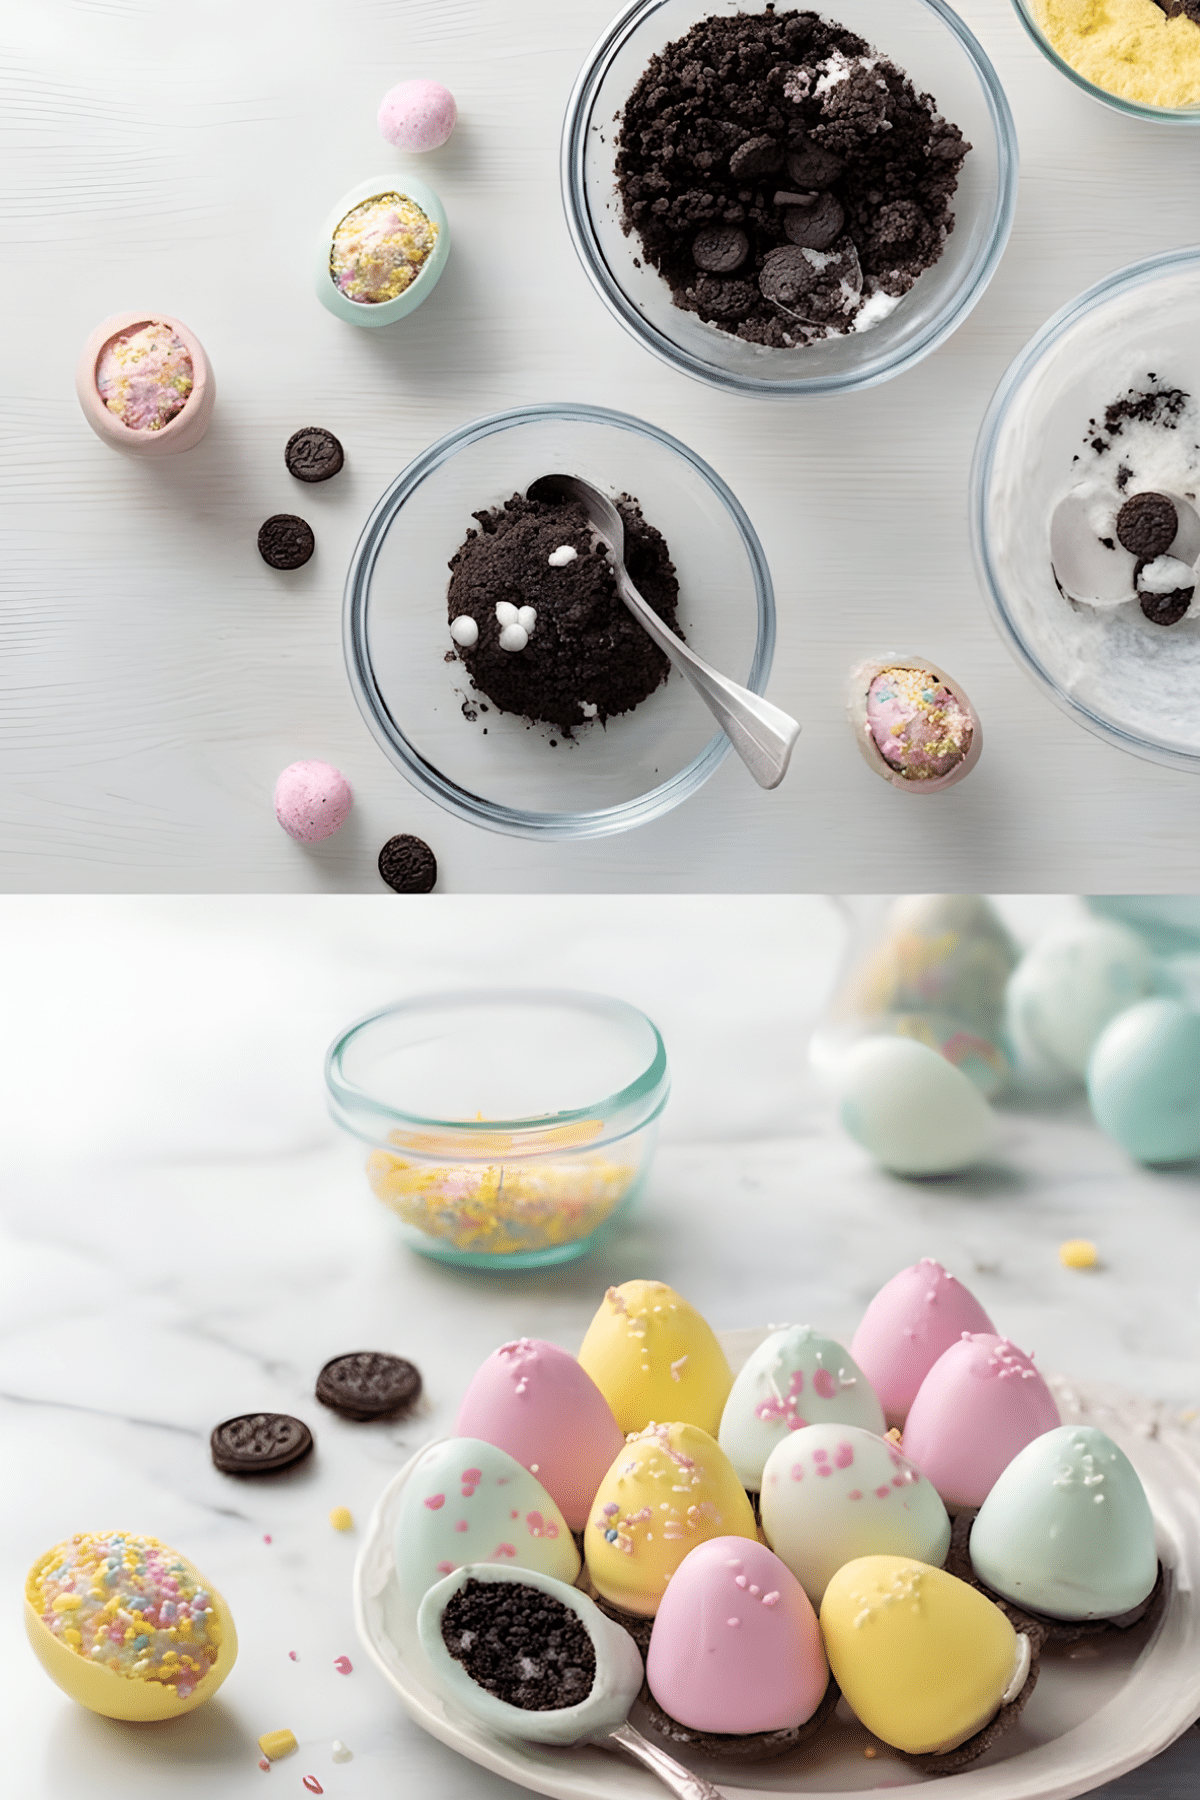
- Crush the Oreos
Place the Oreo cookies in a food processor and pulse until they become fine crumbs. If you don't have a food processor, place them in a zip-top bag and crush them with a rolling pin. - Mix with Cream Cheese
In a large bowl, combine the crushed Oreos and softened cream cheese. Mix until the texture becomes smooth and evenly blended. - Shape the Balls
Use a small cookie scoop or your hands to form the mixture into egg-shaped balls. Place them on a baking sheet lined with parchment paper. - Chill the Oreo Eggs
Refrigerate the shaped cookie balls for about 30 minutes to help them firm up before dipping. - Melt the Chocolate
While the Oreo balls chill, melt the chocolate melting wafers according to the package instructions until smooth. - Coat the Oreo Eggs
Dip each egg-shaped cookie ball into the melted chocolate. Use a fork to lift it out and allow the excess chocolate to drip off before placing it back onto the lined baking sheet. - Decorate
While the chocolate is still wet, add sprinkles, edible glitter, or drizzle colored chocolate over the eggs. If using candy eyes, gently press them on before the chocolate sets. - Let Them Set
Place the decorated Oreo eggs back in the refrigerator until the chocolate coating fully hardens.
Expert Tips & Tricks
Best Practices
- Use room temperature cream cheese to ensure a smooth filling.
- Line the baking sheet with parchment paper so the chocolate doesn't stick.
- Chill the Oreo eggs before dipping so they hold their shape.
Common Mistakes
- If the mixture feels too soft, chill it longer before shaping.
- Avoid overheating the chocolate, which can make it thick or grainy.
Time-Saving Tips
- Crush the Oreos ahead of time.
- Shape the cookie balls a day before and keep them refrigerated until ready to coat.
Serving Suggestions
Pairings
These festive treats pair wonderfully with:
- Hot chocolate
- Coffee or espresso
- Vanilla milkshakes
- Fresh fruit platters
Presentation Ideas
For a charming Easter display:
- Arrange them on a pastel serving platter
- Place them in mini cupcake liners
- Serve them in an Easter basket lined with parchment paper
Beverage Pairings
Light, sweet drinks work beautifully with these treats:
- Vanilla milk
- Strawberry lemonade
- Sparkling fruit punch
Storage & Reheating
Leftover Storage
Store the Oreo balls in an airtight container in the refrigerator for up to 5 days.
They can also be frozen for up to 2 months.
Reheating Methods
These treats are meant to be served chilled or at room temperature, so reheating is not necessary.
If frozen, simply allow them to thaw in the refrigerator before serving.
Frequently Asked Questions
Substitutions & Adjustments
Can I make these ahead of time?
Yes, they are perfect for making a day or two in advance.
Can I double the recipe?
Absolutely. Just increase the ingredients proportionally.
Can I use flavored Oreos?
Yes, flavors like birthday cake or mint can add a fun twist.
Troubleshooting
Why are my Oreo balls falling apart?
The mixture may need more chilling time before shaping.
Why is my chocolate coating thick?
The chocolate may have overheated. Melt it slowly and stir frequently.
Variations & Customizations
Dietary Adaptations
- Use gluten-free sandwich cookies for a gluten-free version.
- Try dairy-free cream cheese for a dairy-free option.
Flavor Twists
- Add a splash of vanilla extract to the filling.
- Mix in mini chocolate chips for extra texture.
Seasonal Versions
These Oreo balls are easy to adapt for different holidays:
- Use pastel colors for Easter
- Red and green sprinkles for Christmas
- Orange drizzle for Halloween
Sweet Final Thoughts
Making Easter Egg Oreo Balls is as joyful as eating them. The simple mixture of cookies and cream transforms into festive little eggs that feel playful and celebratory. Decorating them is half the fun each one becomes a tiny edible work of art.
They're the kind of dessert that brings people into the kitchen together, whether you're crafting them with kids or preparing them for a holiday gathering. Once you see that tray of colorful chocolate eggs chilling in the fridge, you'll know something sweet and special is waiting to be shared.


Easter Egg Oreo Balls
- Prep Time: 20 minutes
- Cook Time: 0 minutes
- Total Time: 50 minutes
- Yield: 24 Oreo eggs 1x
- Category: Dessert
- Method: No-Bake
- Cuisine: American
Description
Easter Egg Oreo Balls are creamy, chocolatey no-bake treats made with crushed Oreo cookies and rich cream cheese, shaped into festive eggs and coated in smooth chocolate. Decorated with sprinkles, drizzle, or candy eyes, they're fun to make, easy to customize, and perfect for sharing during Easter celebrations.
Ingredients
- 1 pack (15.35 oz) Oreo cookies, finely crushed
- 1 pack (8 oz) cream cheese, softened
- 2 cups chocolate melting wafers or white chocolate, melted
- Sprinkles or edible glitter for decoration
- Candy eyes (optional)
- Colored chocolate for drizzling (optional)
Instructions
- Place the Oreo cookies in a food processor and pulse until they become fine crumbs, or crush them in a zip-top bag with a rolling pin
- In a large bowl, combine the crushed Oreos and softened cream cheese and mix until smooth and evenly blended
- Use a small cookie scoop or your hands to form the mixture into egg-shaped balls
- Place the shaped Oreo eggs on a baking sheet lined with parchment paper
- Refrigerate the Oreo eggs for about 30 minutes until firm
- Melt the chocolate melting wafers according to the package instructions until smooth
- Dip each Oreo egg into the melted chocolate and lift with a fork to allow excess chocolate to drip off
- Place the coated eggs back onto the parchment-lined baking sheet
- Decorate with sprinkles, edible glitter, candy eyes, or drizzle colored chocolate while the coating is still wet
- Refrigerate until the chocolate coating fully sets before serving


Notes
Use room temperature cream cheese to ensure a smooth filling. Chill the Oreo eggs before dipping so they hold their shape. Store in an airtight container in the refrigerator for up to 5 days or freeze for up to 2 months.